
Apache Cassandra Tutorial (Step 2 on 4)
The Apache Cassandra database is the right choice when you need scalability and high availability without compromising performance. Linear scalability and proven fault-tolerance on commodity hardware or cloud infrastructure make it the perfect platform for mission-critical data. We’ll see how to configure Cassandra on an AWS EC2 cluster and create a resilient architecture that is big-data ready.
In the architecture we considered, we essentially focused on deploying Cassandra on slave nodes. The steps detailed below can also be used for deploying Cassandra on your Masters.
1. Conexion SSH on each Slave nodes
The first step is to establish a SSH connection with your Slave nodes. If you don’t remenber how to do that, you can check the last section of my previous tutorial :
AWS EC2 Instances Tutorial (Step 1 on 4)
All the steps below should be made for all the slave nodes.
2. Install Java SDK 8
Ones your instances are up and running and the SSH tunnel is established, we need to install Java SDK. Java 8 is indeed required to run Cassandra. Luckily, the installation process is quite simple.
Run the following command :
$ sudo apt install openjdk-8-jre-headless
Once done, we need to define some exports that will allow us to lauch Cassandra easily. Open VI to edit the bashrc file :
$ vi ~/.bashrc
The, add the following lines to the file (you might have to type the letter “i” to insert new lines) :
export JAVA_HOME=/usr/lib/jvm/java-8-openjdk-amd64
export JRE_HOME=$JAVA_HOME/jre
export PATH=$PATH:$JAVA_HOME/bin:$JAVA_HOME/jre/bin
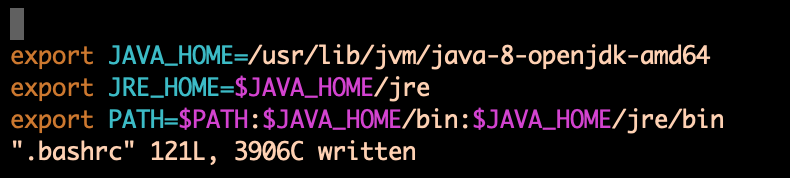
To quit and save changes : ‘ESC’ then write ‘:wq’ then ‘ENTER’
Once you’re back on the terminal, execute the following line :
source ~/.bashrc
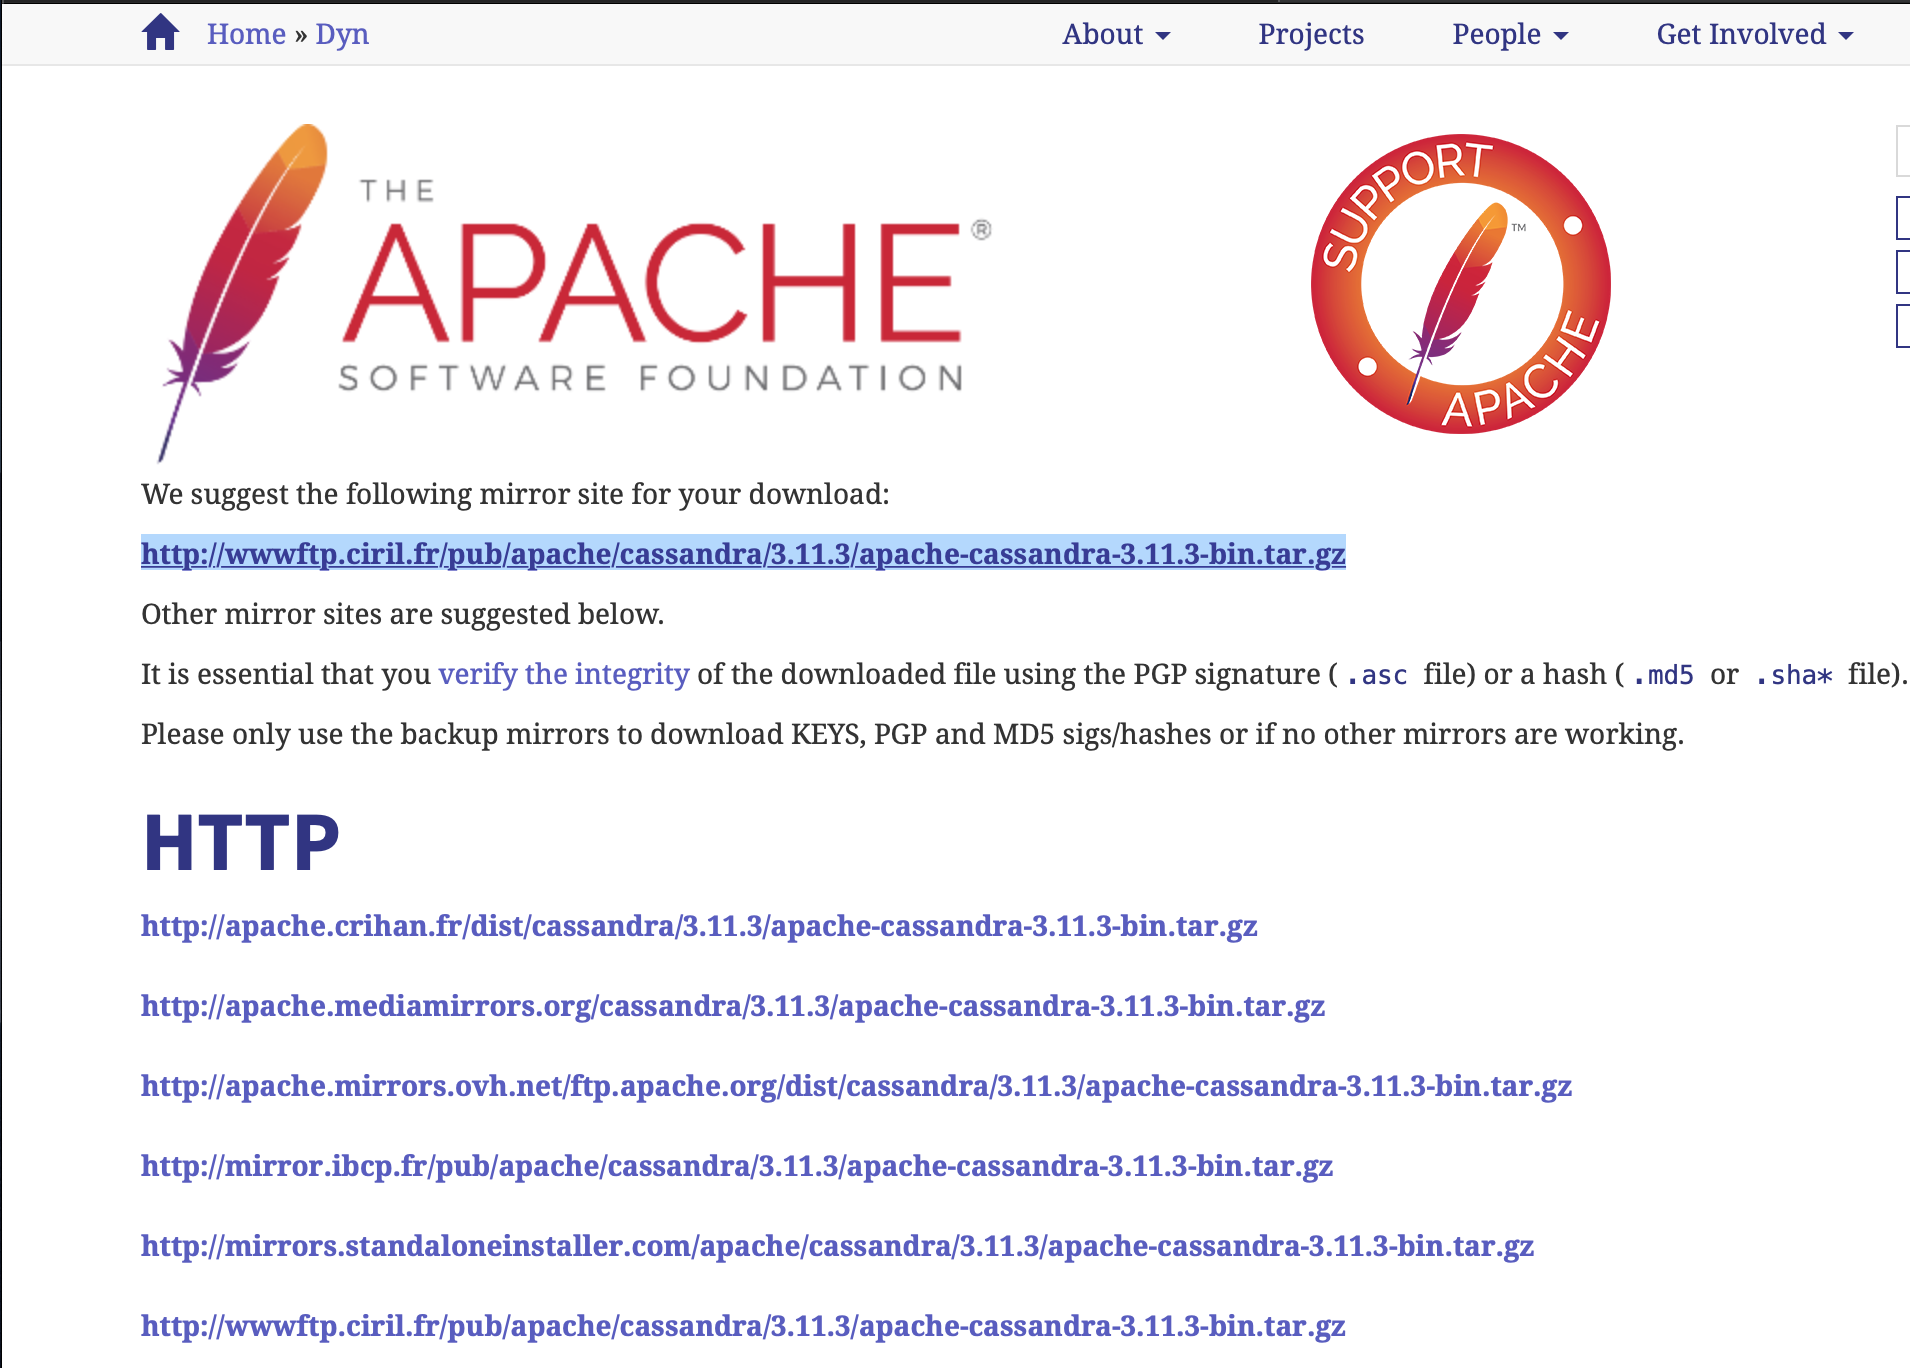
3. Go on Apache-Cassandra’ Website
From Apache Cassandra’s website, copy the download link (version of January 2019) :
Apache-Cassandra’ Website for version 3.11.3
4. Install Apache-Cassandra on your instances
Make sure your on the /ubuntu/home/ directory.
a. Download the .tar.gz file :
Ones your in the good directory, execute the following command :
$ wget http://wwwftp.ciril.fr/pub/apache/cassandra/3.11.3/apache-cassandra-3.11.3-bin.tar.gz
You will see something like this :

b. Extract the software :
The files are compressed. The next step is to uncompress them and extract the software : tar -xv apache-cassandra-3.11.3-bin.tar.gz
Just after, remove the .tar.gz file :
rm apache-cassandra-3.11.3-bin.tar.gz
Your terminal looks like :

c. Replicate the steps above on each Slave nodes
Execute the same commands in order.
5. Configuration of your 5 nodes Cluster
For our tutorial, we need to modify 2 files :
- cassandra.yaml
- cassandra-rackdc.properties
Those two files are in the “conf directory” :
$ cd apache-cassandra-3.11.3/conf/
a. Cassandra.yaml file :
Open the file :
vi cassandra.yaml
We will change :
- cluster_name: “give the name you want”
- listen_address: Private_ip_address (Give it a private IP address specific to this node)
- rpc_address: Private_ip_address (Give it again a this private IP address specific to this node)
- seed_provider: Private_ip_address (A private IP address common to all instances)
- endpoint_snitch: Ec2Snitch
Save and quit.
Example :
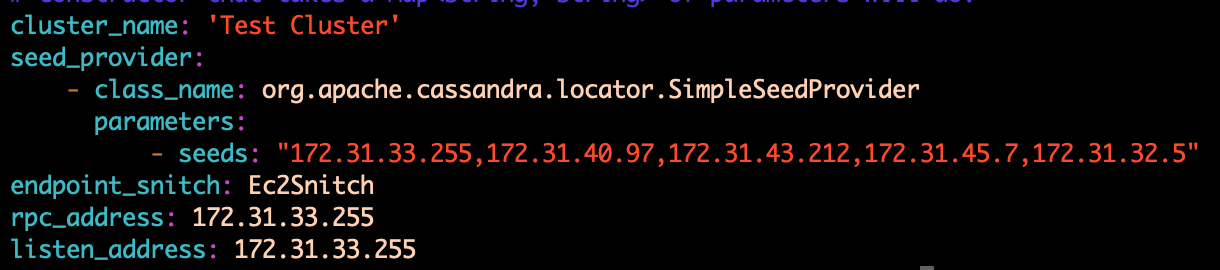
Do the same thing on the 5 Slave nodes.
b. cassandra-rackdc.properties file :
We will consider the simplest framework here : we won’t specify any rack name or data center name. Just comment the two lines that are not commented : 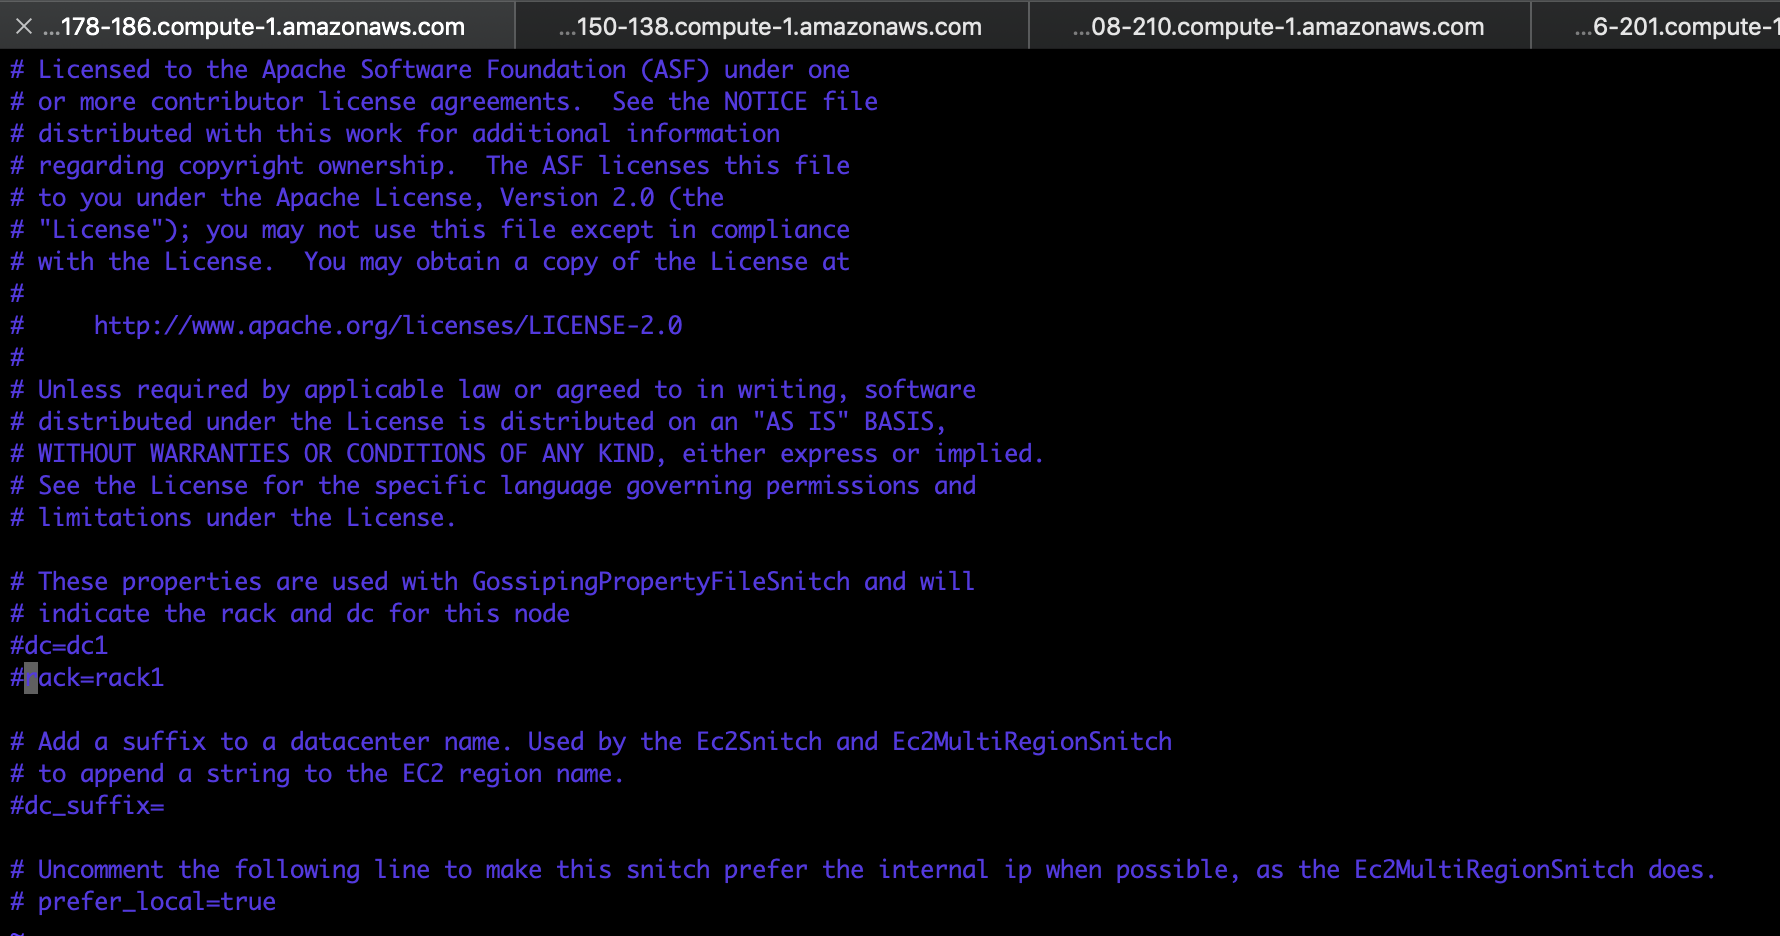
Right now, all the configuration is set for your Cassandra Cluster.
6. Try the node connection
The last step is to try the connection between every Cassandra nodes.
You need to go in the ‘bin’ directory.
Now, execute this commande on each node : ./cassandra
Execute this on each node.
Some lines contain the keywork “Handshaking” which means that the nodes actually communicate.
There is a command to directly describe the connections of your cluster :
./nodetool describecluster
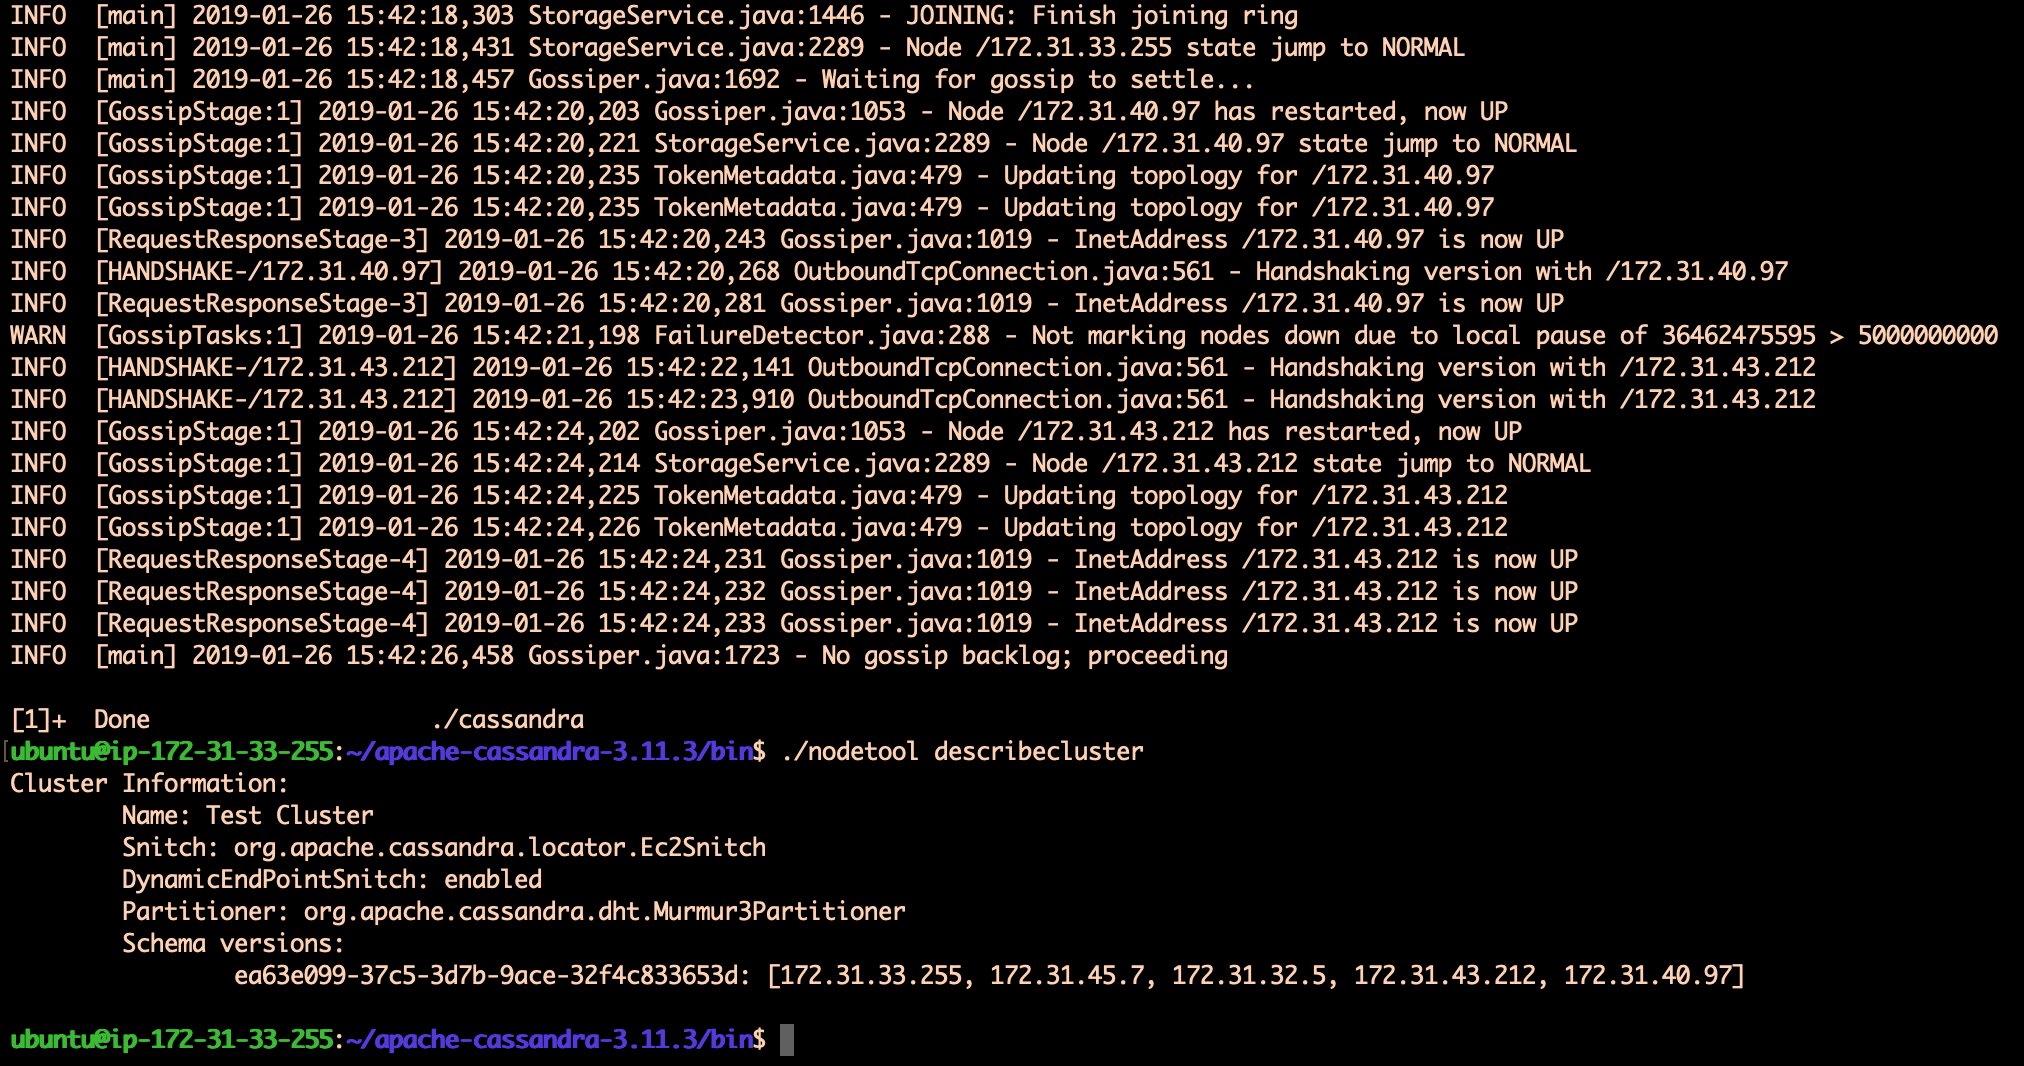
Your Slave nodes with Apache-Cassandra are now configured !
Conclusion : The next step is to install and configure zookeeper on the dedicated node and on two of our five Workers nodes.
You can follow my tutorial : How to install and configure Zookeeper